 This blog post is by request from my Civil War sewing friends. I am going to try to show you through pictures and narrative how to do the hidden hook and eye tape. I must give credit to Carolann Schmitt of Genteel Arts in Gettysburg, without whom I never would have been able to learn this, she teaches this technique in her bodice classes. Also credit goes to my friends in the classes I've taken with Genteel arts, especially Dee Bishop who has helped me learn when my brain wasn't getting the process.
I've been fortunate to live close enough to Gettysburg to have taken quite a few classes at Genteel Arts (they're on the web, definitely check them out), but I'm still learning and probably will be forever! This is a technique that gets easier the more you practice. I've seen plenty of original dresses with the tape installed as well.
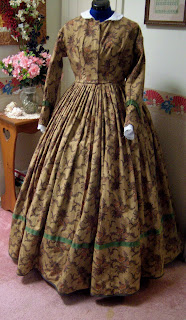 Here my latest finished project. It's a cotton reproduction print about 1850's or so. With this hook and eye tape technique, you can cut the fabric so that the right and left sides are going to carry over your fabric pattern smoothly like in this large repeat floral print.
After you get your new pattern pieces made (below) the left side of the fabric will be cut out first on single thickness of fashion fabric , and the right then will be cut in conjunction with where the pattern is on the left. Just remember that the left side's seam line will be sitting at the same point as your center front line on the right bodice...pin your left piece down to another repeat that is the same as you have in your left and place your right bodice pattern piece accordingly so the pattern continues across. It's not difficult, I just don't have any cotton prints going right now to show you so you'll have to take my work on that. Don't worry, it'll make sense soon...just follow me and I'll explain.
I'm going to give you instructions for making your new pattern pieces and then the left side construction first since I'm making a bodice as I go for this and haven't gotten it all finished yet. Please leave comments if you have any questions, and I'll answer them as I can.
 The first thing you have to do is to make yourself a pattern piece that is different for the right and left. Here's a picture of the Period Impressions bodice pattern piece which is the same for both sides, just to use as the basis for your own adjusted pattern. Now I'm not recommending this pattern manufacturer or any other, in fact, my fitting shell is made from the Past Patterns darted bodice but I couldn't find it this morning to use. Your favorite pattern is fine.
 Take some pattern tracing paper and make 2 of these bodice pattern pieces, mark one left and one right, and make the right one about 2 or 3 inches wider than the purchased pattern piece you're using. Draw on your darts and your seam lines in the front edge onto both right and left. The seam line here is the second line in (I'm sure you knew that, but just in case). Don't cut either out of the paper quite yet.
 This is my left side pattern piece. This is the fashion fabric side, you'd flip it over to cut your lining. I know it's hard to see, but the seam line is drawn in on the pattern piece, and the cutting line is 1/2 inch past the seam line. Mark your cutting line on your left side pattern piece only. Now, cut out your new left pattern piece and mark it well as being the left. Make sure you write yourself a note on the pattern piece that you have to flip it for the lining... Most of us use muslin for linings so I have mine correct for the left bodice for the fashion fabric and just cut the muslin on the same pattern side.
 Still with me? Now it's time to make your right pattern piece.
 This is my right piece. It's flipped to the fashion fabric side right now so it looks like the left, it isn't, promise. You've traced out your own right pattern piece, so now it's time to draw a line for your seam/fold line (same seam line as on your original bought pattern, a line 1/2 inch in for your center front, and one 1/2 inch to the other (out) side of your seam/fold line for your stitching line. You're going to have 3 lines each 1/2 inch from the other starting 1/2 inch in from the seam line on your pattern piece. Make sense so far?
 Then allow an inch and a half to 2 inches more and draw your cutting line, then cut out your new pattern piece and label it accordingly as the right side. I believe my fitting shell's cutting line is about 1.5 inches past my stitching line, the amount isn't that important, you're going to turn it under and finish it anyway. The center front line will match up with the pattern on the fabric where you've cut your left side stitching/seam line. I'll go more into the workings of the right side in the next blog post.
 Here are my two marked linings lined up for you to see (and the right piece is sitting on the right, left is on the left like you'd cut the lining). I've drawn the lines on the lining pieces for you to see as well. Now use the cutting lines on your pattern to cut out your lining and your fabric, being sure to get the fashion fabric's pattern across the bodice to match up if there is one using the method above. I'm working on 3 dresses right now but none of them have a definite pattern on them to illustrate how to match it up, I do apologize, and if you need me to I will do a separate blog post for that. Just leave me a comment if so.
I don't usually draw the lines on my linings, I simply cut a 1/4 inch slit into the top and bottom on the lines and press them to make my fold and stitching lines. I make tiny cuts for my darts too, because I know how long they're supposed to be when sewn for myself. (I don't sew for other people).
 Here is my left side lining. I've pressed the seam allowance (1/2 inch) toward the inside. So press yours into the inside of the garment. Go ahead and do the same pressing of 1/2 inch for your seam allowance on the fashion fabric, keeping in mind that you're pressing to the inside but it'll be in the opposite direction from the lining. I'm only telling you this because I've made this mistake.
  You'll want to measure and cut your hook and eye tape so that the top hook/eye is no closer to the top of your bodice than 1.5 inches, and the bottom hook/eye is not any closer to the bottom than 1.5 to 2 inches. The top you'll need room if you're going to wear a broach, and the bottom you'll have your waistband and you're also leaving room to finish the bodice with your piping. I use 11 hooks and eyes, that's just me, I'm short waisted. I'm using silver hooks here but the only original hook and eye tape I've actually seen on garments was black painted hooks with black hooks and eyes. It's not going to show and I'm not entering any dress competitions with so I'm ok with using what I can get. I cut both of my tapes at this time and put the hook side aside for now.
Pin the eye side of your tape down to the inside of the pressed down seam allowance on the left bodice lining like pictured above. Put the hook tape right at the edge but in just a touch...the eyes will stick out over the edge. Sew the hook and eye tape through the seam allowance and the lining piece, using your zipper foot or whatever foot works best for you. You can do this by hand if you'd rather but it's quick on the machine. You just need to catch the tape on the edge away from the eyes, you don't need to get right up against the eyes. Trust me, you'll break needles on this one if you're too close. You can see my stitching at the far left side of the tape, it's just at the outer edge of the tape.

Now place the fashion fabric on top of the lining with the hook tape inside. Match up your edges and pin. Adjust the pressed seam line if necessary so that it lines up with your lining, pin.
Don't be tempted to sew your darts yet, you'll do that when you're done with the hook/eye tape.
You'll want your fashion fabric to stick out ever so slightly over your lining or at very least be flush with it, again making sure that the seam allowance has been pressed or pinned into the inside of the sandwich. Now you'll whip stitch the two layers together by hand, making sure you put your thread through the eyes as you get to them. Sorry, those that hate hand sewing, but honestly it goes really fast and is easy. :) Use a thread that matches your fashion fabric, it's not going to show on the inside anyway. Now go ahead and do your darts on the left side. You've finished the left side, and we're ready to start with the right...
1 comment:
Your blog are impressive to each other.I read your blog its very good and friendly, Help ful for all.
globaltapesandtwills.com Polyester Tapes Manufacturers
Post a Comment